 Contact
 Andy's Parts Smarts
 Cart
Cart

Integra Type R Modifications
One aspect that makes owning a Honda/Acura exciting and involving is the vast selection of aftermarket parts to choose from. My main goal has been to improve performance, create a "clean" customized look and at the same time avoid negative side effects in the process. These include adversely affecting ride quality, noise, safety and reliability. Only after a great deal of research and consideration will I decide to purchase a particular product.
This section provides a detailed look into the aftermarket parts I have selected. For each product you will find a review, pictures and even a few videos. I hope this information assists import enthusiasts, Integra owners in particular, during their search for the best aftermarket equipment.


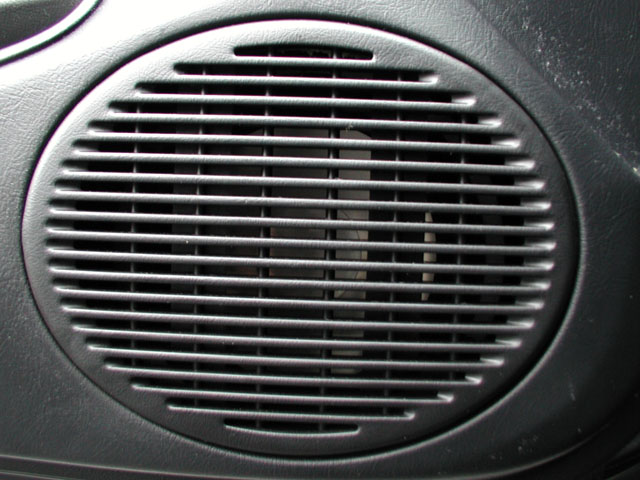 |
Audio System (Head Unit / Amplifier / Speakers) |
|
Purchase Location:
Stay
Tuned Cost: $1,08.00 + Labor Purchase Date: November 2001 / August 2003
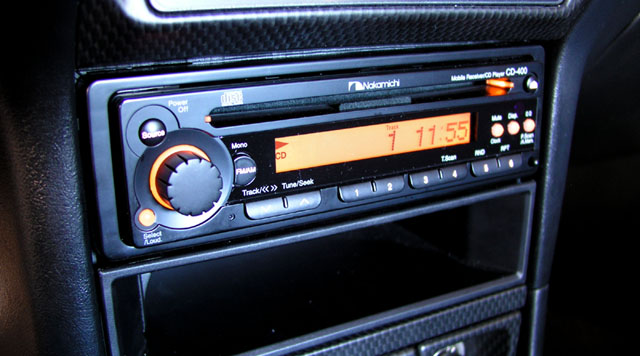
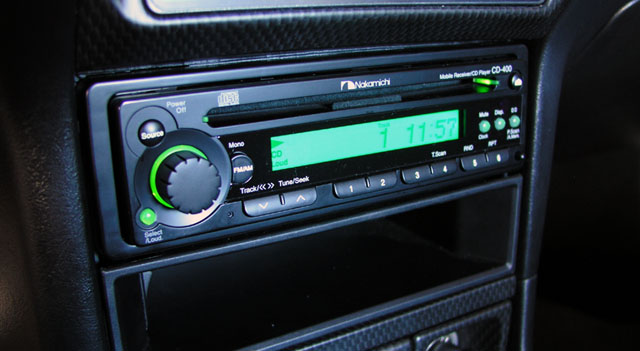
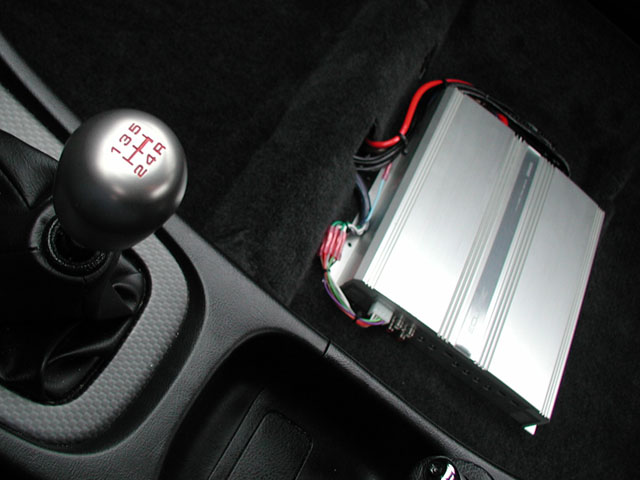
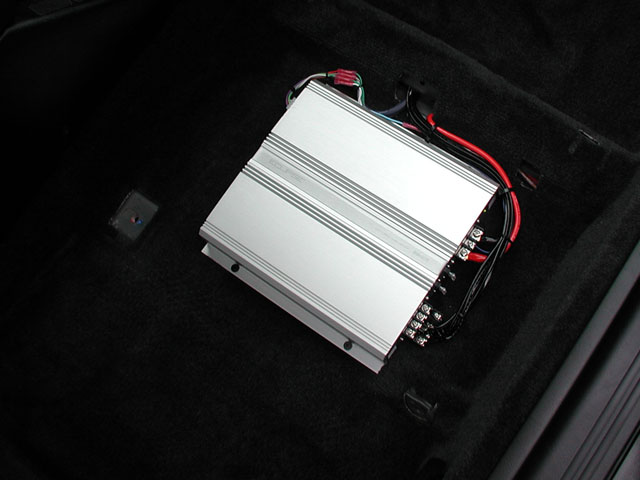
Nakamichi CD 400 head unit $298 About a year and a half ago I had a professional car audio shop install new speakers and an amplifier in my car. I wanted better sound and a bit more volume. At the time my stock CD player was working fine so that went unchanged. I knew that an aftermarket head unit would improve quality but none of the units available really caught my attention. Nearly 3 years of constant use, my stock CD player started deteriorating, FAST. Small bumps would make CD’s skip and even G forces from cornering caused my stock CD player to skip. Very annoying! I tried a CD cleaning disk with no long term luck. So the search began. I visited every major audio place in town for a replacement head unit in the $200 - $350 price range. Each visit concluded with me being extremely frustrated with the products on display. With the issue of sound quality aside – every head unit had multicolor flashing lights, too many pointless features, small flimsy buttons, and cheapo detachable face plates. Who really wants to see low resolution displays of dolphins swimming in circles? My quest finally ended a couple weeks ago while searching eBay. A couple auctions appeared for the Nakamichi CD400. Some people say it looks bland and boring but I call it beautiful. Several reputable online stores were selling these head units for just under $300 (they still are). I purchased mine from http://www.cbrstereo.com because of their low price and great feedback rating. I believe the retail value for this unit is around $550. This head unit is excellent, period. Sound quality/clarity has been improved significantly. Keep in mind that I already have aftermarket speakers and an amplifier installed. This is why the sound quality improvement has been so dramatic. I am particularly impressed by the quality of the tuner on the CD400. The clarity of radio stations is shocking. Not surprisingly, this head unit allows the volume level to be raised without distortion, well beyond the capabilities of the stock unit. For example, in comparison to the stock head unit, the CD400 can extract more detailed midrange and more bass. This is much appreciated since I do not have a subwoofer. The display is very clean and simple - reminiscent of the stock configuration. The buttons have a great feel - solid yet cushioned. You would never know that it has a detachable face plate from the solid construction. The volume knob is slightly larger than stock making volume changes quick and comfortable. The most important cosmetic feature is the user-selectable color scheme. You can choose a green or AMBER color scheme. The amber blends well with the Type R interior lighting. A couple cool features include a blackout mode button, a mute button, and a handy remote control. It even has a clock which is great for me since I removed mine in place of the Valentine concealed display. During my research I discovered that Nakamichi filed for chapter 11 last year. I guess the company was having problems making a profit. In addition they had a few previous head units that were having reliability problems (not the CD400). Ug! This made me think twice about buying the CD400. A week passed (still had not purchased the head unit) and during this time I made a few new contacts. I discovered that Nakamichi went under new management and that their products were doing much better in terms of quality control. In addition, the CD 400 won the “Design & Engineering Showcase Honors” by Innovations International. This news gave me enough confidence to make the purchase. $300 is a great deal for this quality product (if it proves to be dependable). Most mid-level CD players will run you at least $300. Keep in mind the CD400 does not play MP3’s nor is it XM compatible. These two issues are probably the only shortcoming of the CD400. The reason I wrote this review is to let you guys know there are conservative alternatives to the era of disco-ball-style CD head units. |
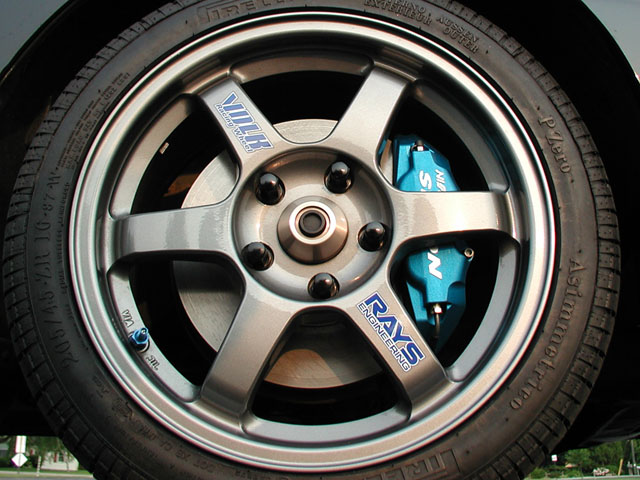 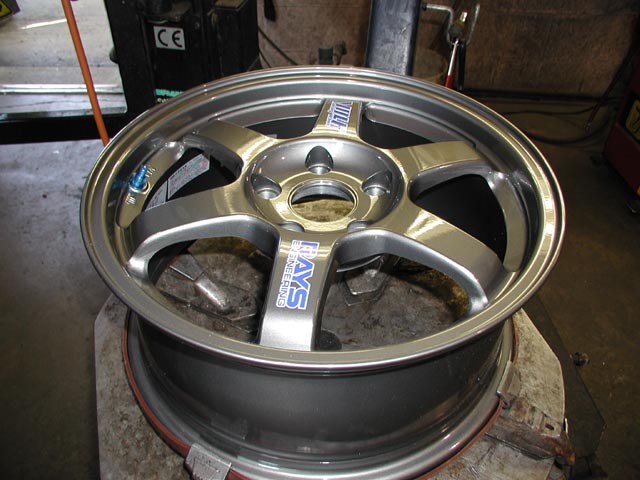 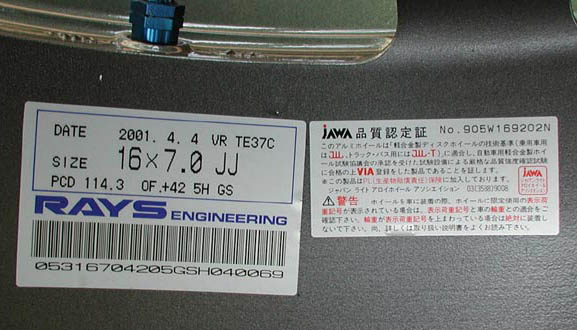 |
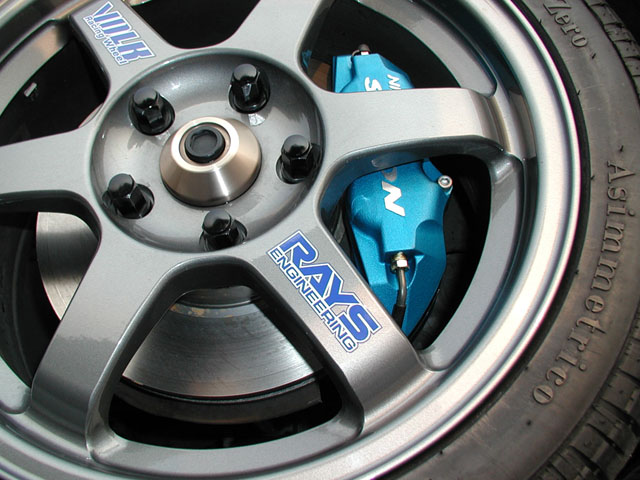
Forged Gunmetal Volk Racing TE-37's |
|
Purchase Location:
Big Bear Tire
Cost: $1,600.00 Purchase Date: Spring of 2001 The Volk TE37 is one of the lightest and highest quality wheel currently available. This 16 x 7 inch forged wheel weighs only 12 pounds. The stock cast 15 x 6 inch Type R wheels weigh about 15.6 pounds each. The offset of these TE-37's is +42 mm. If you are considering upsizing (one size) for your Integra a 16 x 7 inch wheel with +42mm to +43 mm offset is optimal for performance. Despite the fact that 15 inch wheels are on the small size they are optimal for performance due to the weight savings they provide. Wheels smaller than 15 inches will not fit the Type R due to clearance issues created by the 11.2 front brake rotors. If performance was the only aspect important to me I would have chosen the TE-37's in the 15 x 7 inch size. They weigh only 9.2 pounds apiece - a 6.4 pound savings compared to the stock wheels. In addition to looking for a lightweight wheel I also wanted a slightly more aggressive look so this helped me choose the 16 inch size. During the period I made this purchase only two other light weight wheels were available. These wheels are the forged Mugen MF10's and the forged RacingHeart CP-035's. The Mugen MF10's look great but they are only offered in bronze and cost $550 per wheel! In addition, wheel strength and quality of the Mugen wheels are not any better than Volk rims since they are both manufactured by Rays Engineering/Mackin Industries. The CP-035's cost about the same as the TE-37's but they are only offered in white and gold. Gunmetal was the wheel color I preferred. Manufacturing: The raw material used for construction is 6061 aircraft grade aluminum. This material is hot forged. The 1st forging process is done with pressure of 5,000 kilograms per square centimeter. The 2nd forging process is a slow process with 3,500 kilograms per square centimeter. The lip is also forged to 3,500 kilograms per square centimeter. This allows the wheel to have less material than other wheels, but have more strength and durability. The wheel's excess material is machined off (to tolerance of 1/100 of a millimeter). Powder coating and clear coating is done by a special proprietary process to ensure long lasting quality and durability. The weight of Volk Racing TE37 is 8 lbs. for 15 x 6.5 and 16 lbs. for 18 x 8.5. Related Links: Official Volk Wheel Site The Tire Rack |
|
||||||||||||||||||||||||||||||||||||||||||||||||||||||||||||||||||||||||||||||||||||||||||||||||||||||||||||||||||||||||||||||||||||||||||||||||||
|
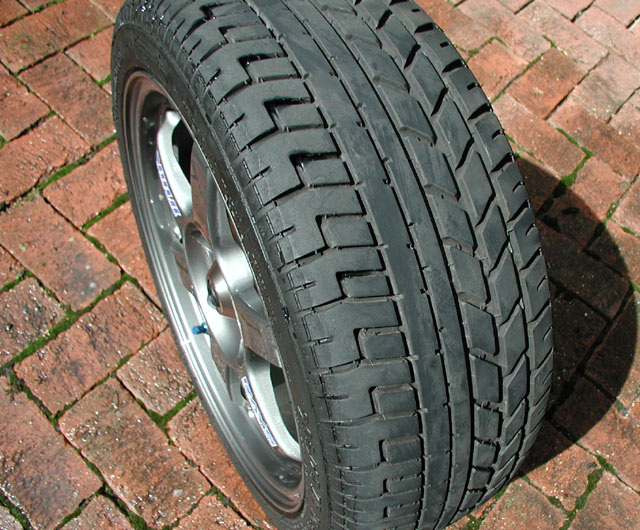
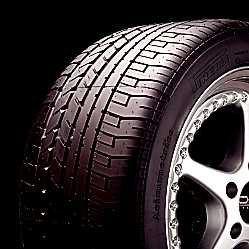
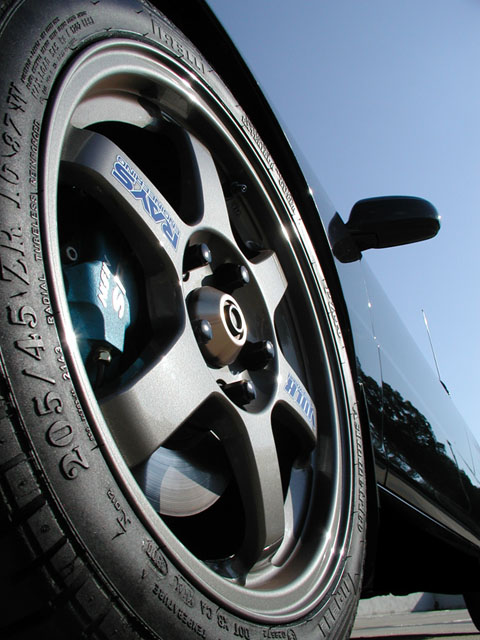
Pirelli PZero Asymmetrical Max Performance Summer Tires |
|
Purchase Location:
Tire Rack
Cost: $475.00 Purchase Date: Spring of 2001 Pirelli Pzero Fast Facts
New stock Type R wheels with tires weigh about 36.6 pounds. 15.6 lb rims + 21 lb RE010's. The 16 x 7 TE-37's and 205/45/16 Pzeros with air weigh 32.4 pounds. That equates to a 4 pound weight reduction per wheel. The Pzero's are classified as a Max performance tire with a relatively comfortable and quite ride. The main disadvantages of these tires is their short lifespan and mediocre performance in the rain. These Pzeros should last about as long as the RE010's, maybe a little longer. realized that if I want maximum grip I would need to purchase new tires every one to two seasons. 30,000+ mile tires, such as A520's, Parada's, and Nitto's, would be downgrading the traction of the car. Related Links: The Tire Rack |

|
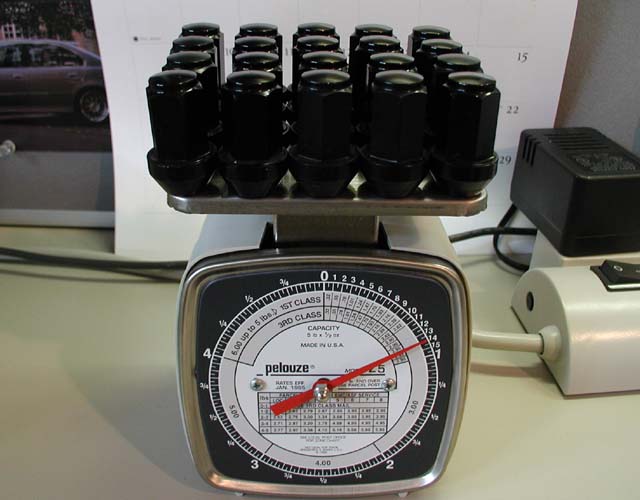
7075 Aluminum Lug Nuts |
|
Purchase Location:
Big Bear Tire
Cost: $50.00 Purchase Date: Spring of 2001 Roughly 1/3 lighter than the stock steel lug nuts, these aluminum help reduce unsprung weight. 0 - 60 MPH is now decreased to 4.6 seconds (just kidding). |
 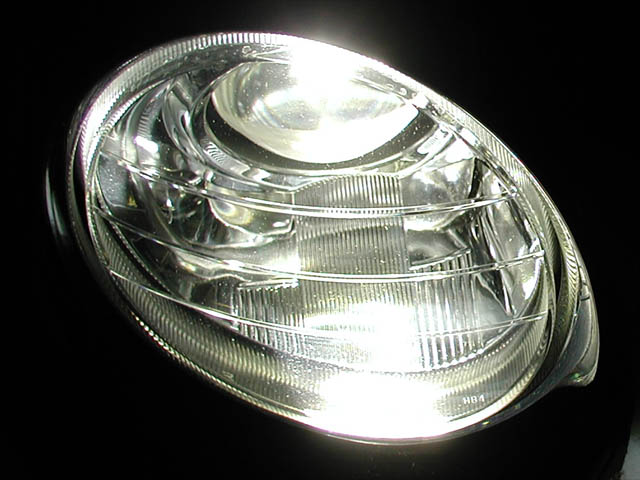      |
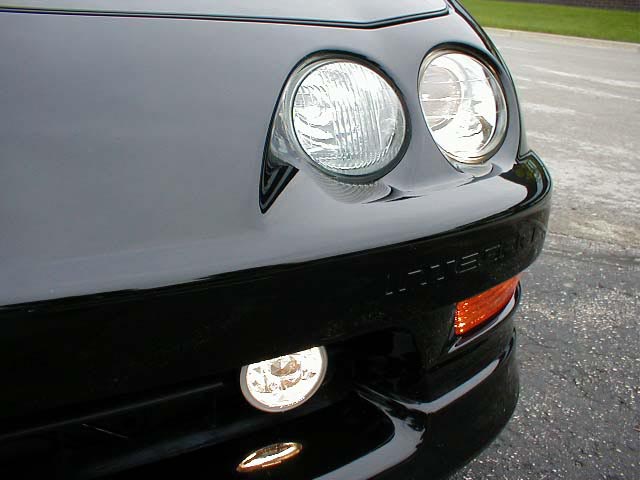
Philips HID Xenon Low Beam Lights (9006) |
|
Purchase Location:
Visual Dynamics
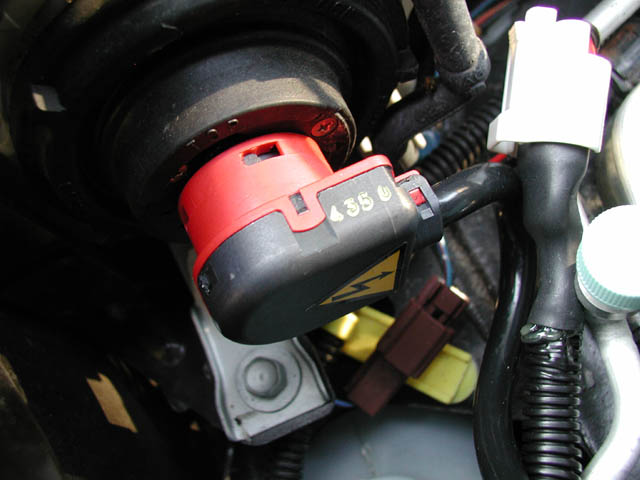
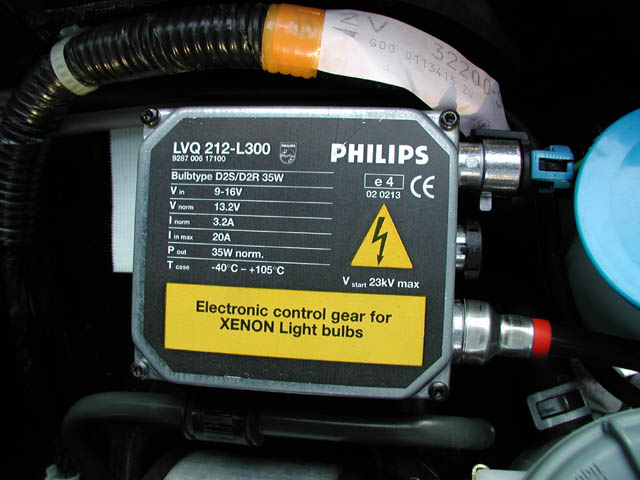
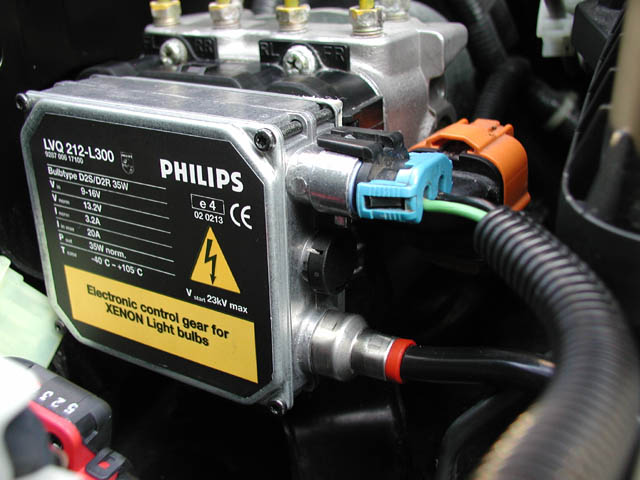
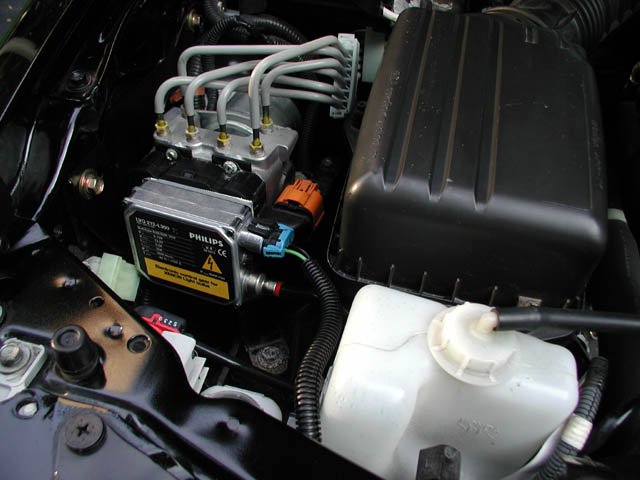
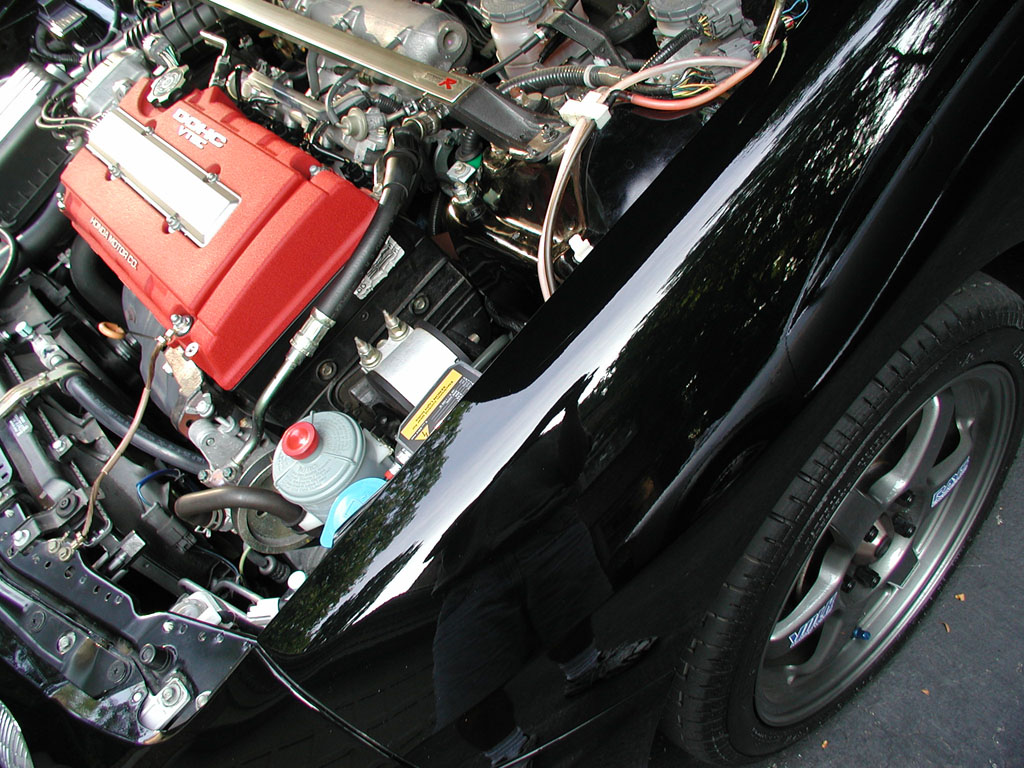
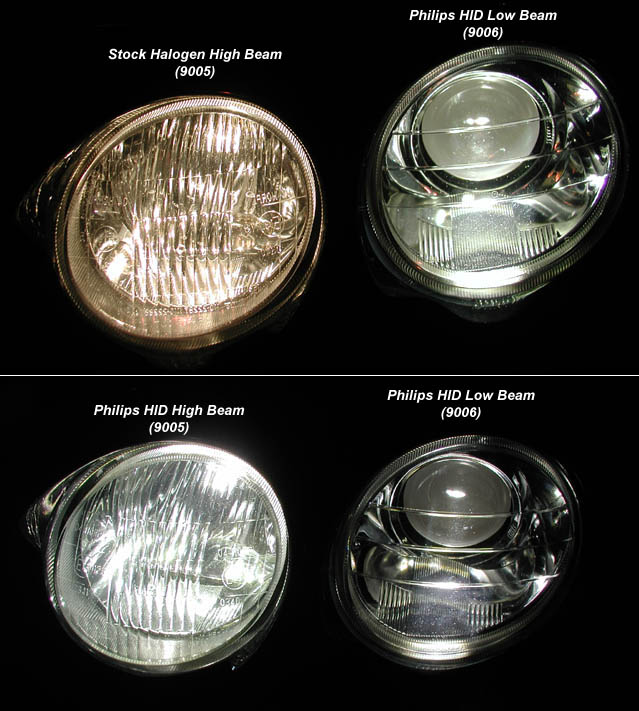
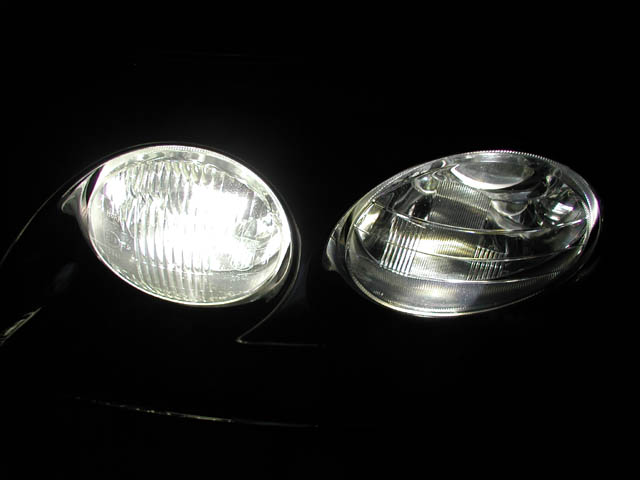
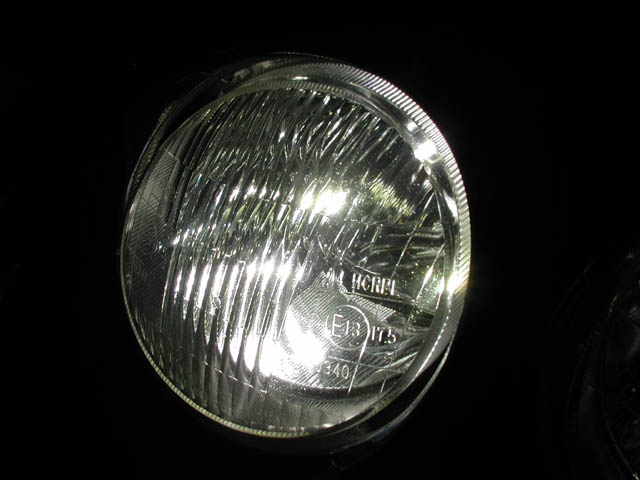
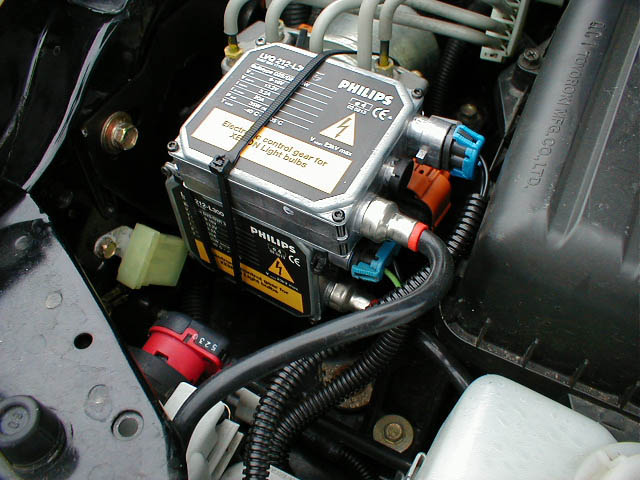
Cost: $500.00 - Contact Trevor at 905-261-8960 and mention this web site (itrsport.com) and receive a $10 discount on this Philips HID kit. Purchase Date: July 2001 The kit is simple to install, and I do mean simple. It took me less than 30 minutes to install on my car. Now that I know how the install goes I could install the same kit in under 20 minutes. The kit is designed specially for Honda's with 9006 headlights (driving lights/low beams). All you do is plug in the Xenon lights, secure two ballasts, and your Integra looks as cool as the high end BMW's and Audi's. Believe it or not, the ballast's are attached via sticky tape and velcro, which works surprisingly well. I do recommend using zip ties for added security. Here is a night time comparison between PIAA Platinum Series Super White bulbs VS. the Philips HID kit. Before I purchased these lights I was a bit skeptical about this photo comparison but after installing them on my car I was pleased to see that this picture is quite accurate. For those of you who are not familiar with Xenon lights, they have a 5-10 second warm up period when you turn them on (very entertaining to watch). They turn on instantly, like or stock halogens, but the initial color is bluish purple. After about 5 seconds the bluish tint fades into a crisp white color. The video clip I made is a bit deceiving because it appears the light gets darker during the warm up period (in actuality the digi cam is just adjusting the light aperture). But the clip does give an okay demonstration of how the light changes from blue to white. In person the lights are even more impressive. This Philips HID unit for the Integra is the real deal. The appearance and quality ranks next to the units found on these high end automobiles. Another great thing about these lights is that it does not aggravate oncoming traffic. The 3rd Gen Integra has a very precise low beam cut off. This keeps the intense light of the HID's on the road and out of the eyes of oncoming drivers. How it works: Xenon lighting is based on the gas-discharge principle, where an arc of light is created between two tungsten electrodes in an extremely small gas-filled capsule. This gas-filled capsule contains a combination of metal halide salts in a xenon gas mixture which must be instantaneously ignited with a very high voltage (25,000 volts) to obtain a critical temperature. Once this temperature is reached, the gases ionize causing the metal halide salts to vaporize. When this occurs, the lamp will discharge full light output. Providing the gas discharge bulb with a fast enough start, hot re-strike, and optimum performance requires the aid of an electronic control gear and starter which are integrated into one component (ballast). Benefits of High Intensity Discharge Xenon Lighting Over Traditional Halogen Lighting:
|
       |
Philips HID Xenon Low Beam Lights (9005) | |||||
|
Purchase Location:
Visual Dynamics
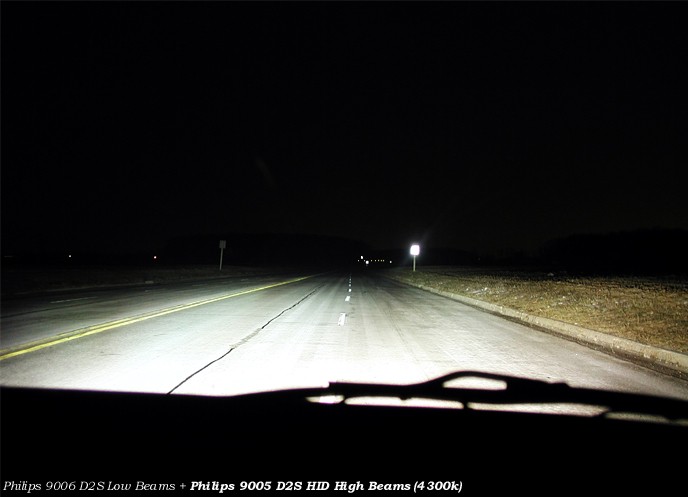
Cost: $500.00 - Contact Trevor at 905-261-8960 and mention this web site (itrsport.com) and receive a $10 discount on this Philips HID kit. Purchase Date: February 2002 The bulbs are the same type as the low beams - D2S, 4300K, 3200lm light output. The ballast are the same too. The only difference is a slightly redesigned wiring harness and bulb base for proper fitment. FYI - The 6000K bulbs actually produce less light (2800lm) at the sacrifice of a whiter/bluer look. Light output is easily 2-3 times brighter than the stock Integra halogens. The beam pattern is very precise and surprisingly focuses for the amount of light being emitted. There are no dark areas on the road where the light fails to illuminate. Even the ditches and trees lining the road are super visible. When the high beam HID's are initially turned on they go through that brief 3-5 second warm up period. They change from the blue color to a mostly white hue. The light intensity noticeably increases during this warm up period - something that is not as apparent with the HID low beams. Flipping the HID high beam kit on and off (a necessary task) is not a problem. I have switched them on and off 200-300 times during the first month my car has been equipped with them and they never fail to ignite. The high beam HID's "appear" to be brighter than the low beams. The illusion is probably created by the overlapping sets of HID's. This combination is extremely effective and also unique considering that virtually no other production car in the world offers HID high beam lights. The pictures do a good job of displaying the color comparison between the stock halogen's and HID's but the HID's are much brighter than the pictures and video indicate. Related Links: Philips.com - Xenon Lighting |
||||||
       |
Aluminum 4 Piston Spoon Calipers |
|
Purchase Location:
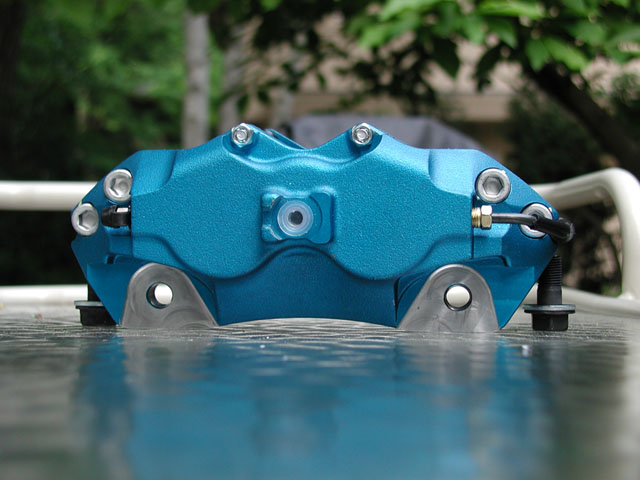
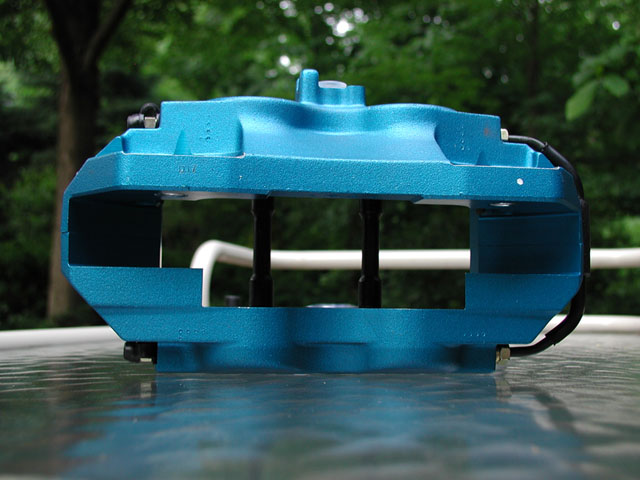
IPS Racing Cost: $1,300.00 Purchase Date: May 18, 2002 In one word - Amazing! I noticed a difference in how the car drives even before I left the Acura parking lot. No joke! The Spoon calipers are so much lighter than the stock calipers that considerably less effort is needed to turn the steering wheel. This sure caught me by surprise. It feels like the power steering is on overdrive. The spoon calipers weigh about 5.5 pounds each while the stock calipers are approximately 13.5 pounds each. Brake feel and control is quite a bit different from stock. The new braking pedal range is longer than the stock setup. This allows the driver to have more control during aggressive breaking or during normal driving situations. In addition, the actuation of the brakes is now more linear than the abrupt and almost immediate bite of the stock system. This is the primary characteristic that makes them a killer tool out on the track. Even with the improved braking force that the Spoon calipers provide, the driver can avoid locking up the wheels while driving at the limit. The pedal feel is fantastic. You can feel how the four piston design displaces the braking force on the caliper more evenly from the brake pad, again, allowing for more control and less drama.
History and Development Excellent characteristics of the aluminum body: The aim in the development of this product was reduction of spring weight. By adopting aluminum for the body, it was possible to achieve a weight of 2,400 g, approximately half that of the mass-production vehicle, and this can be easily envisaged by considering the difference between aluminum foil and steel foil. By reducing the under-spring weight, it has been possible to improve wheel contact and surface following, and this in turn has realized major increases in sense of driving and riding comfort. Excellent characteristics of the four-pot: Two differing diameters of 42.85 mm and 38.18 mm have been adopted for the four pistons; specifically, the smaller diameter is used for the entry of disk rotation; the larger, for the output side. Accordingly, it has been possible to counteract the self-servo effect, which occurs when the disk rotates during pad application, and as a result, the pressure applied to the disk by the pad has been made more uniform. Also, this improvement enables excellent, stable braking performance to be assured over long service lives. |
|
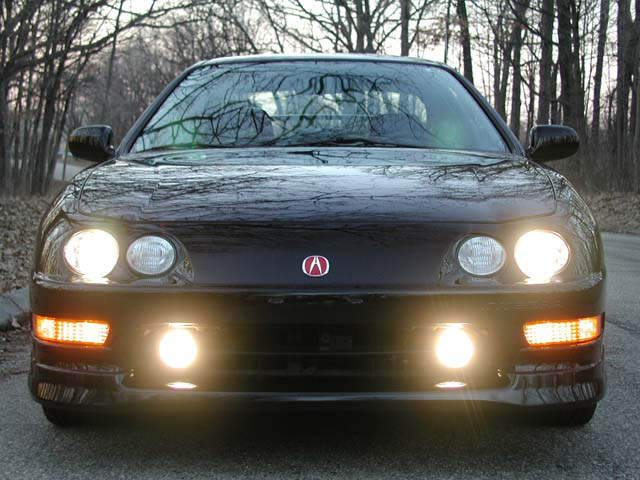
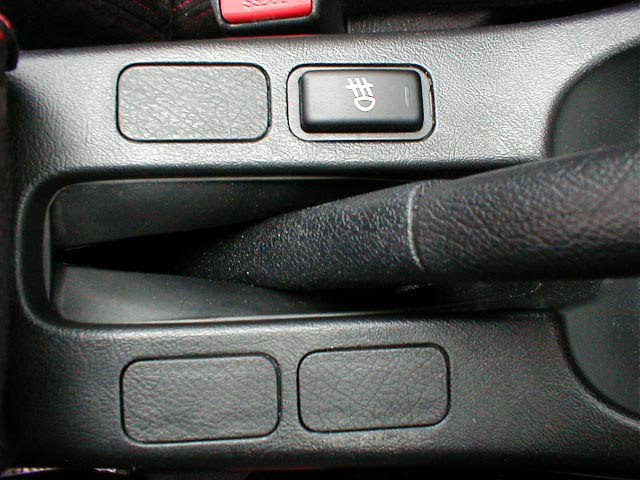
Factory Fog Lights |
|
Purchase Location:
A&H Motorsport
Cost: $215.00 Purchase Date: May 25, 2000 After searching the Internet for pictures of integras with fog lights I came to the conclusion that the factory fog lights are one of the best looking and most durable. I had a set of Auburn PIAA 1400's for my previous GS-R. They fit the car well but I had a problem with one of the lights prematurely failing. I thought PIAA had a good reputation but after that incident I decided to try something new. There are several basic reasons I chose these lights. First of all they do a spectacular job of providing perferial vision. Secondly, they fit perfectly. They were designed to fit the car and for this reason they look great and I won't need to keep adjusting them in the future. Finally, another positive of factory fog lights is the warranty that comes with them. Since they were installed at Acura and are factory equipment I will have no problem getting them fixed or replaced. Yes, you can find cheaper fog lights but for a little extra money why not purchase the best? |
| Factory Security System / Keyless Entry | |
|
Purchase Location:
A&H Motorsport
Cost: $278.00 Purchase Date: May 25, 2000 The only security the Type R comes with stock is an immobilizer system. The standard immobilizer system uses a special transponder embedded in the key to prevent the engine from being started by an unauthorized key or hot wiring. The added security system allows you to open the door via remote and will activate the horn during a break in. Once activated the alarm will sound if any doors are opened or if the sound of breaking glass is detected by a microphone. The sensitivity of the microphone can be adjusted. The option button on the key fob allows you to choose whether or not the horn will briefly honk when you lock/unlock your car via remote. I keep it switched to the silent mode since the short honk is rather loud. Obviously the sounding alarm will not prevent a thief from breaking in but it should minimize damage or theft. |
|
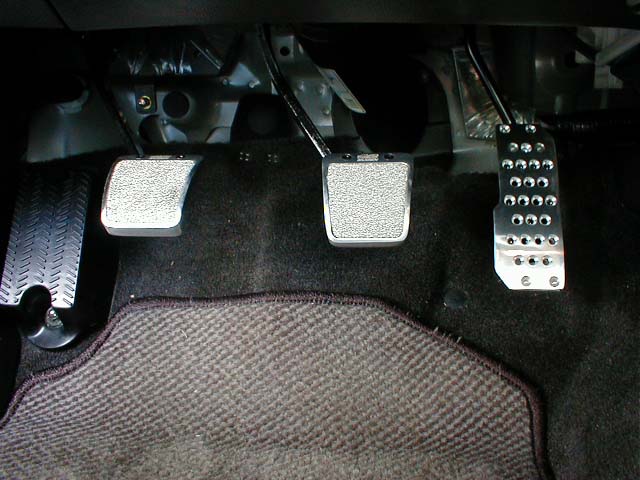
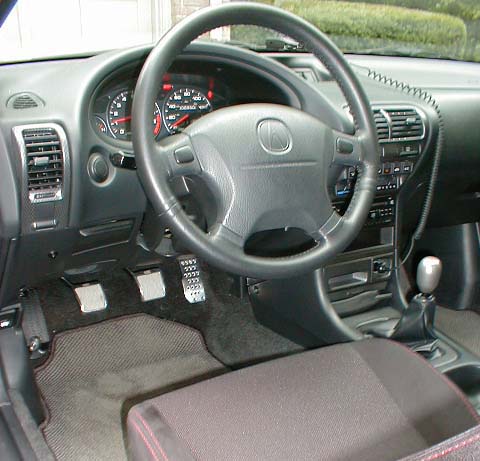
Mugen Sports Pedal Kit |
|
Purchase Location:
King Motorsports
Cost: $174.00 Purchase Date: July 18, 2000 Yes, that is a lot of money for sport pedals. If you think they are overpriced you are probably right. The reason I purchased Mugen pedals is because there is nothing else out on the market that look this attractive and fit so well. My motto with the Type R is buy the best or not at all (That is why I'm probably not going to buy more aftermarket goodies because Mugen stuff costs too much). Most aftermarket pedals use flimsy "fit all" brackets that strap the pedals over the stock rubber units. I had this style pedal on my previous GS-R and they looked a little better than stock but not nearly as clean as these. The Mugen pedal kit requires you to remove the rubber pedal covers in order to install them. This minimizes weight and produces a very attractive look that you can find on the Honda S2000. Here is Mugen's explanation for their sports pedal kit: "In mass-production vehicles, the accelerator, brake, and clutch pedals all have the same type of rubber surface. However, in formula machines, only the surfaces of the brake and clutch pedals are made non-slip. This is because in racing, where more demanding footwork is required, the accelerator requires exactness, but the brake and clutch require grip. Mugen believes that this also holds true for sports driving, in which nimble footwork is needed. With Mugen sports pedals, the accelerator has a wide front and rear with a buffed surface finish, while the brake and clutch pedals are small pedals with a nickel-chrome blown metal non-slip surface. All the pedals have a cast aluminum base. They are fitted by replacing the original rubber." |
|
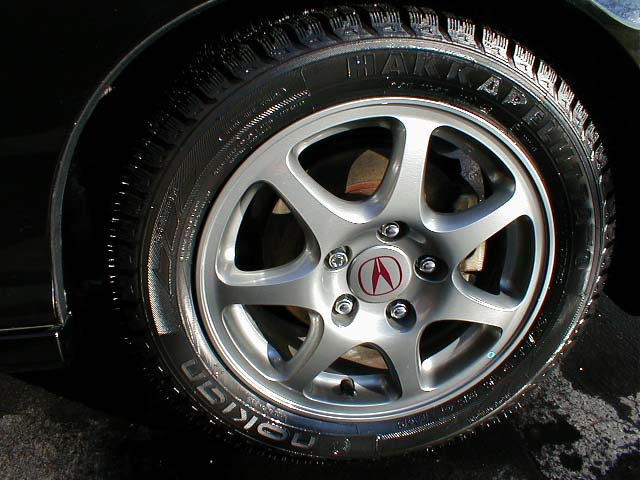
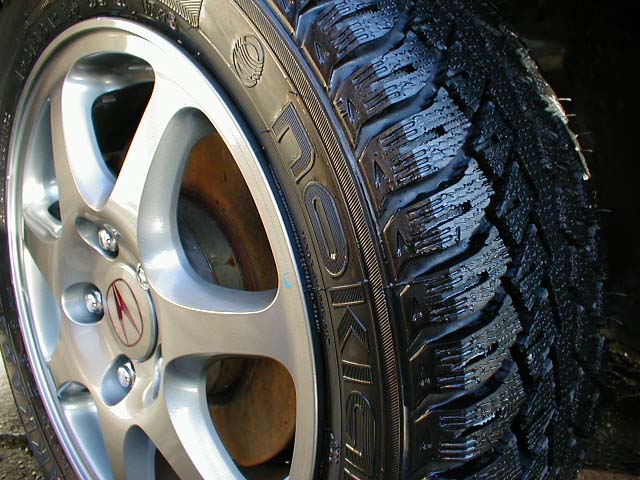
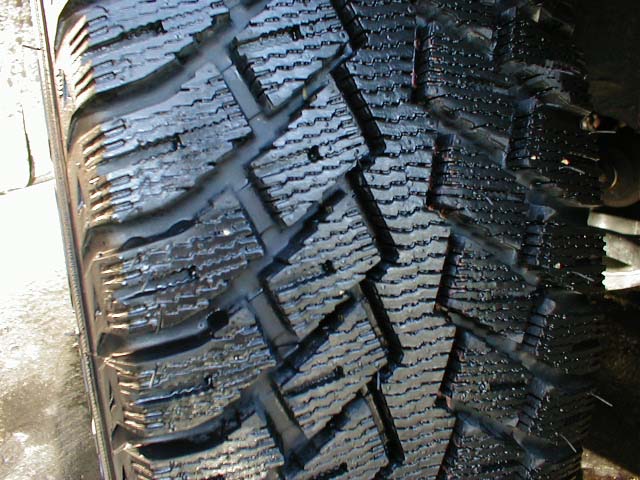
Nokian Hakkapeliitta Q Snow Tires (195/55/15) |
|
Purchase Location:
Big Bear Tire
Cost: $400.00 Purchase Date: November 22, 2000 Since I travel between Wisconsin and Indiana during the winter months a set of snow tires are a necessity. These tires have done a great job of providing traction on snow cover roads. After owning a GS-R for several years I really appreciate the additional traction of the Type R's LSD (limited-slip-differential). Wheel slippage have been dramatically reduced in comparison to the one wheel wonder GS-R with an open differential. These are wonderful snow tires but when the roads are clear I really miss the stock RE010's. The Hakkapeliitta's have quite a bit of side wall flex. This characteristic of all serious snow tires gives the car a floating feeling when simply changing lanes. Despite this lack of dry pavement precision these Nokian tires provide a quiet and cushioned ride. According to the tread wear ratting they could last up to 35,000 miles. Related Links: Offical Nokian Site Big Bear Tire The Tire Rack |
|
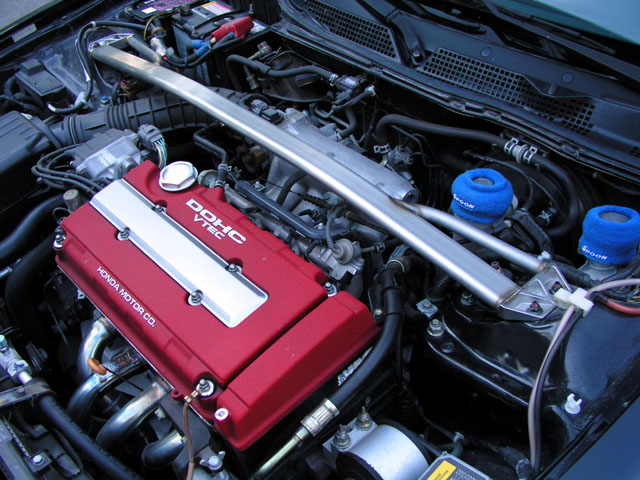
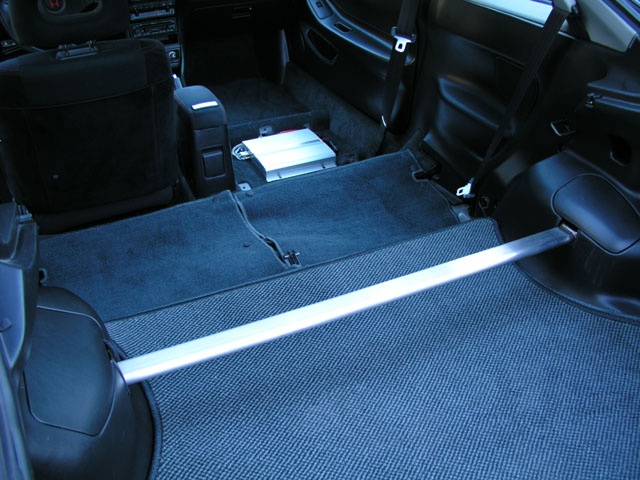
Mugen Front and Rear Upper Strut Tower Bars | |
|
Purchase Location:
King Motorsports
Purchase Price: $280.00 Future Purchase Date: Summer 2002 Mugen particularly aimed to increase the stiffness of the suspension mounting points through its efforts to improve traction and handling during cornering. By setting the tower-mount bearing points on the suspension upper mounts, Mugen tower bars enable a more positive suspension system stroke, in addition to assisting in reinforcing the chassis. (In case of fitting of the rear tower bar, notching the plastic interior panels is required. All templates are included. |
|
AEM Cool Air Intake - Removed and Sold |
|
Purchase Location:
A&H Motorsport
Cost: $262 / Sold used for $125 Installation Date: June, 2000 Removal Date: January 1, 2001 February 17, 2001 - Product Review after Removal Roughly seven months after driving with the AEM CAI I decided to reinstall the stock air intake system. I installed the CAI at around 6,000 miles and had it removed at 14,000 miles. After going back to the stock intake the car does not feel any slower. I defiantly enjoy having the car quieted down, especially during longer trips. It was fun to hear the "sonic boom" when the larger cam lobes engaged but the every day noise was too obnoxious. The excessive noise was not the primary reason I chose to remove this system. The minimal to no gain in performance was the primary factor. Many dyno tests of other Type R's equipped with just the AEM CAI usually demonstrated a loss of torque below 4,000 RPM. This aspect basically negated the benefit of the few additional HP the motor could produce near peak RPM. It is important to realize that the stock Type R intake system is different from the units found on other Integras. The Type R's air induction location is within the front right quarter panel of the car. This design is technically a cool air intake system since it does not draw in the warm engine air, like other Integras. Consequently, this modification may be more advantageous for other Hondas. The threat of ingesting water during heavy rain/flooding was another consideration of mine. I have heard of several people in my home town that destroyed their Integra/Civic motor by driving through standing water with this intake. The risk of destroying a B18C5 motor for some noise and 2 HP at peak RPM is not worth it. June 2000 - Original Product Review (some opinions have since changed) The AEM CAI intake is widely considered the best first modification for the money. While I find it hard to believe the manufacture's claim of a 15 hp boost there have been many dyno tests that indicate a notable hp and torque improvement. Another positive of this intake is simply how it compliments the cars appearance under the hood. The matt aluminum finish, instead of the black plastic air box makes things more attractive. One drawback of this intake design is the increased risk of drawing water into the engine or otherwise known as hydrolock. Since the location of this intake inlet is positioned just above the splash guard and not higher up in the fenderwell, like the stock air box, one needs to avoid driving through standing water. I would imagine that this risk is extremely low considering the fact that hundreds of customers have avoided complications for years. Another characteristic of the AEM intake, good or bad depending on your perception, is the increased noise during heavy acceleration. If your perception of the Type R is obnoxiously loud stock I would not recommend this intake. Plain and simple this intake increases engine noise from loud to booming during full throttle acceleration. In my opinion the beauty of this system is that during normal driving there is hardly a noticeable increase of noise. But when the pedal is to the floor and VTEC engages it's an entirely different story. Why does this product allow for more HP? For starters the stock air box is more restrictive than the AEM intake. This means that the air has a more difficult and lengthy path to follow before entering the throttle body. If you look at the AEM intake you can see it is mostly strait with smooth flowing corners. Why would Honda design a restrictive intake? The designers created an intake that would sacrifice a little performance (and I do mean a little) in order to reduce engine noise. The baffles and chambers within the stock air intake system help minimize vibrations therefore minimizing noise. The designers of the AEM CAI intake had only one goal in mind; design an intake that maximizes performance without a concern of noise production. For this reason the AEM intake is very loud by many peoples standards but it does free up a few extra horse power. The other reason this intake allows for more horse power is because it utilizes air that is found outside of the engine bay. This air is cooler than the air found in the engine bay, hence the name cool air intake (CAI). So why is colder air better for performance? Cold air is dense air meaning that it contains more oxygen. More oxygen means that the engine will compensate by added more fuel and more fuel means more power. Engine output will increase by about 1% for every 10 or 11 degrees Fahrenheit drop in air temperature. |
|
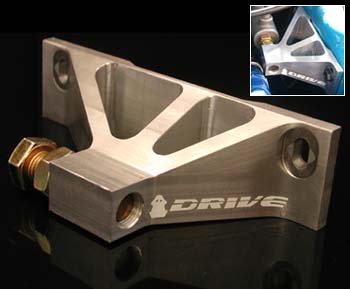
Drive Master Cylinder Brake Brace - Removed and Sold |
|
Purchase Location:
Evasive Motorsports
Cost: $90 / Sold used for $65 Installation Date: August, 2003 Removal Date: August. 2003 This unit is very high quality – solid and well engineered design that fits perfect. You need to remove the strut tower bar for accessing this area. The simple instructions are easy to follow. It’s not too difficult to install, however it takes some dexterity to install the bolt right next to the brake fluid reservoir due lack of space. If you have the right tools you can do the install in about 15 minutes. Driving Impressions: You can defiantly feel a difference right away with even light to moderate breaking. What this means is that brake pedal travel is shorter and you’ll notice a stiffer feel. This brace does not allow the master cylinder to flex, period. Here’s the interesting part of the story. People who promote master cylinder braces say that the stiffer brake feel results in, “greatly improving brake feel and sensitivity”. My experience was just the opposite. The stiff pedal feel and (slightly) shorter pedal travel actually left me with less break feedback and what seemed like less control. The manufacturer actually claims that it will “reduced brake fade” too. I never thought it would do that and still can’t imagine that a brace could accomplish this task. I drove around for a couple days with this brace and came to the conclusion that I definitely prefer the feel without a master cylinder brace. I did not purchase this unit thinking it would actually improve breaking, but rather had the inclination that it may heighten my driving enjoyment and maybe improve brake control. This was not the case for me. Brake setup: Spoon Calipers / Axxis Ultimate Pads / Motul 600 Brake Fluid / Stock Brake Lines |
|
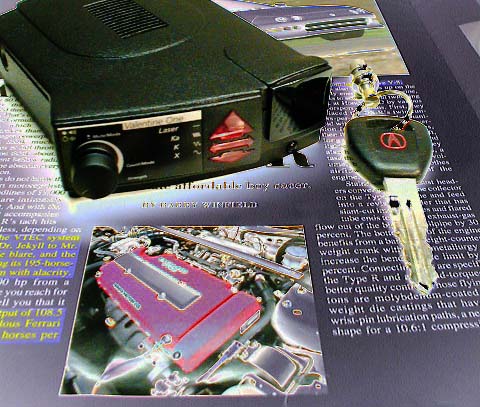
Valentine 1 Radar/Lazer Detector |
|
Purchase Location:
Valentine One
Cost: $399.00 Purchase Date: February 2001 Valentine One has a patented warning system relying on both forward and rearward -facing radar antennas (front and rear laser sensors too). It goes beyond Ordinary Detectors by telling you -- on every alert -- where to look, and how many to look for. Once you have this intelligence report, you can easily decide when to defend, and when you can simply shrug off a non-threatening alarm. Related Links: Valentine One CarReview.com |

|
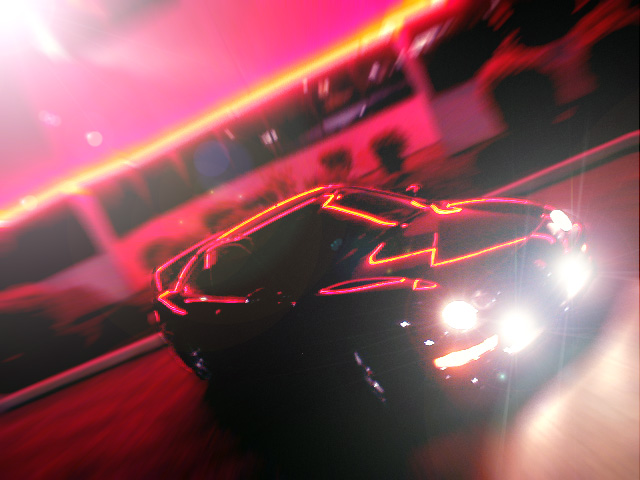
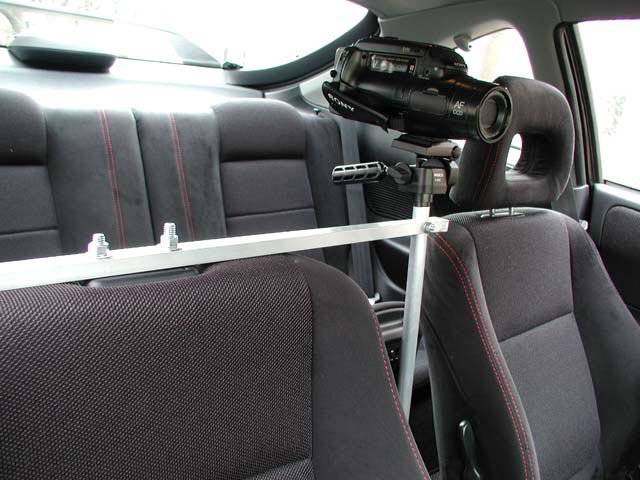
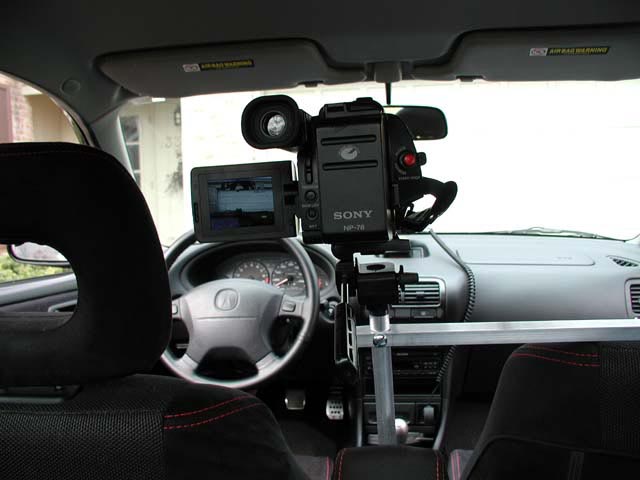
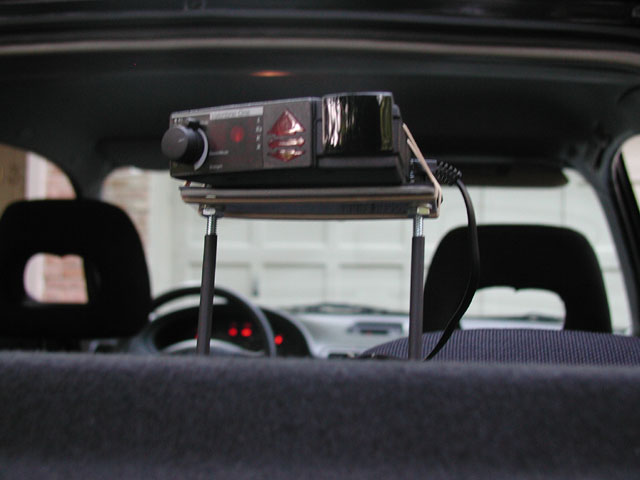
Integra Camera Mount | |||||
|
Purchase Location:
Ace Hardware
Cost: $15.00 Purchase Date: March 2001 To create additional camera angles for photography and videos I designed this camera mount.
Visit the gallery section and check out the shots called
"driver's view" to view several examples.
|
||||||
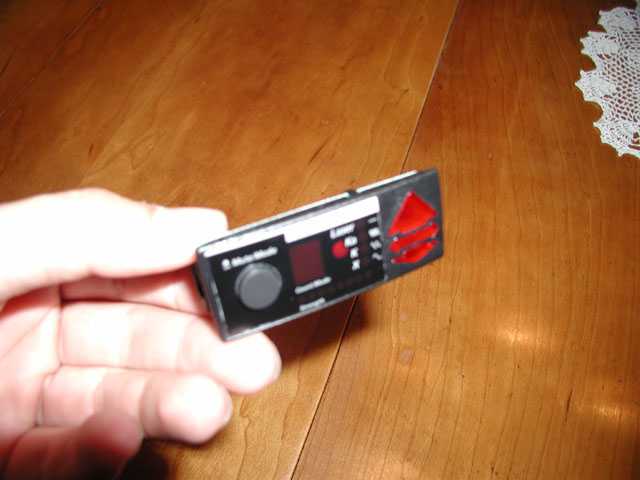  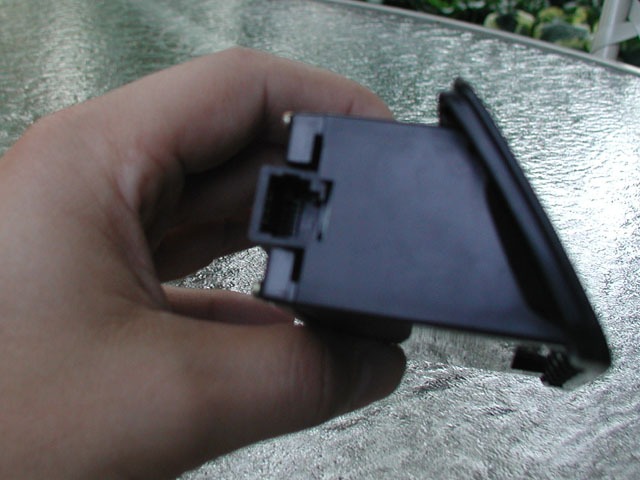 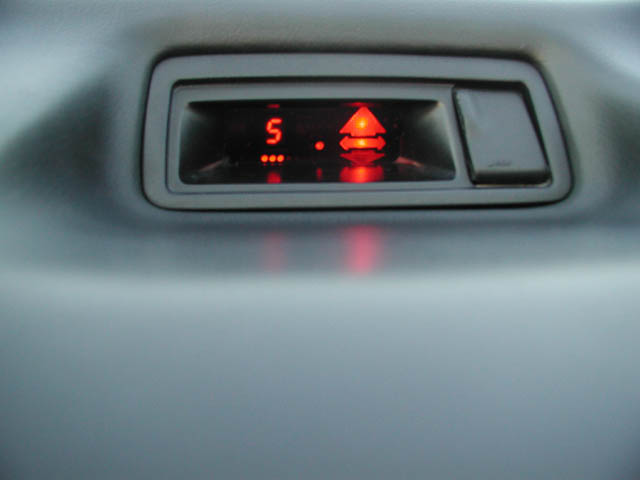  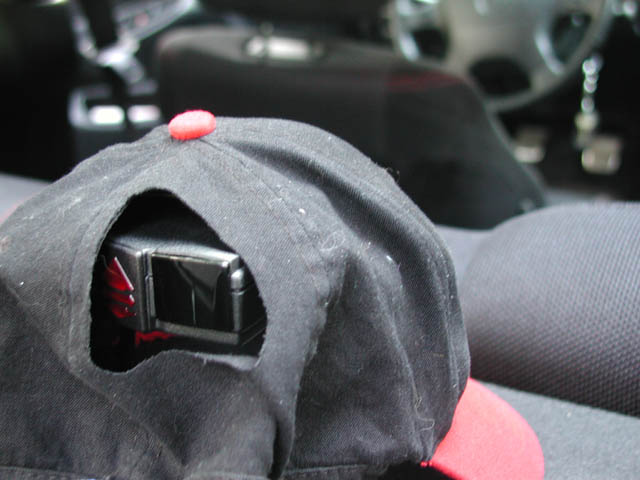  |
Concealed Install of the Valentine One |
|
Cost: $110 + Valentine One Construction Date: July, 2002 I chose to mount the concealed display in the clock position to truly make it “concealed.” In addition, the concealed display is ideally placed to observe while driving. I have never been fond of the idea of sticking a goofy looking plastic block right in front of my speedometer/tachometer (which is what many people do with their remote viewing unit). I went
to my local automotive salvage yard and picked up another
Integra clock so I did not need to destroy mine. The clock does
not even need to work since this design only utilizes the clock
shell. I then gutted the clock itself and affixed the concealed
display. I doubt
too many people would guess what’s under the hat. |
