 Contact
 Andy's Parts Smarts
 Cart
Cart

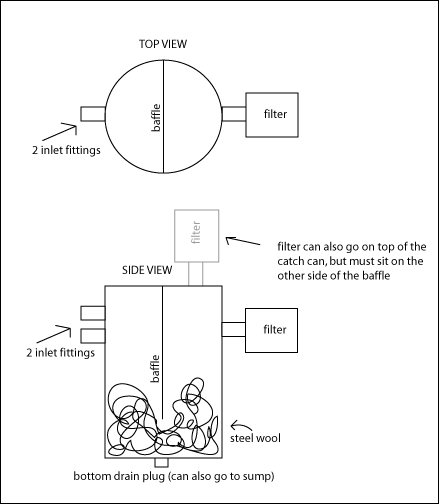
DIY Oil Catch Can
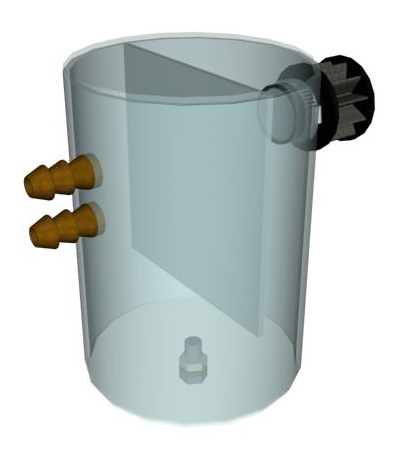 |
| 3d diagram provided by Daniel Please click for a larger version. |
Sometimes called an oil-air separator, these items are a useful addition to any car, but especially CA18DET's as they are known to have quite a bit of pressure in the crank case. The catch can acts as a reservoir for the oil blown out of the outlets of the tappet cover. Instead of being tapped back into the intercooler piping before the turbo, and also directly into the plenum as is standard procedure, the 2 lines both run into the catch can.
Any oil that comes out of these lines then is trapped in the can, with no oil being recirculated back where it isn't needed. Every few months its a simple matter of letting the excess oil drain from the drain plug at the bottom of the can. Alternately you can run a line back down to the sump to let the oil drain down there automatically.
This avoids the common problem of oil all through the intercooler piping, intercooler plenum and vacuum lines, and ensures that only clean air is circulated in these areas and eventually burnt in the motor.
If you have facilities to weld and paint, this project is relatively simple, costs about $40 to do (depending on what you have lying around already), and can be completed in an afternoon.
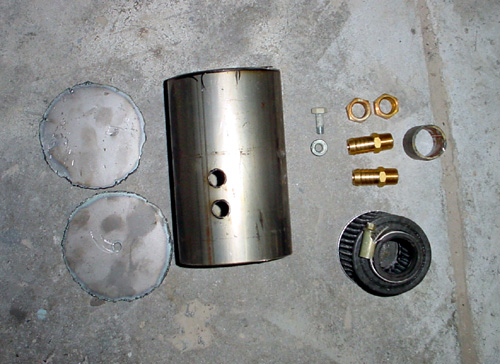
Items needed
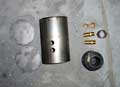 6"
length of 4" diameter mild steel exhaust pipe (about $5)
6"
length of 4" diameter mild steel exhaust pipe (about $5)- 1 small sheet of mild steel for top and bottom plates, and the baffle (about $1)
- small air filter ($? - we had ours already - check out Super Cheap stores etc)
- hose fittings (5/8th") and nuts to suit (about $14)
- nut and bolt for drain plug (free - use anything that will do the job)
- small length pipe to suit mouth of air filter ($1)
- 5/8th" breather hose to run from tappet cover x 2 ($10)
- 4 new hose clamps ($7.50)
- steel wool
Tools needed
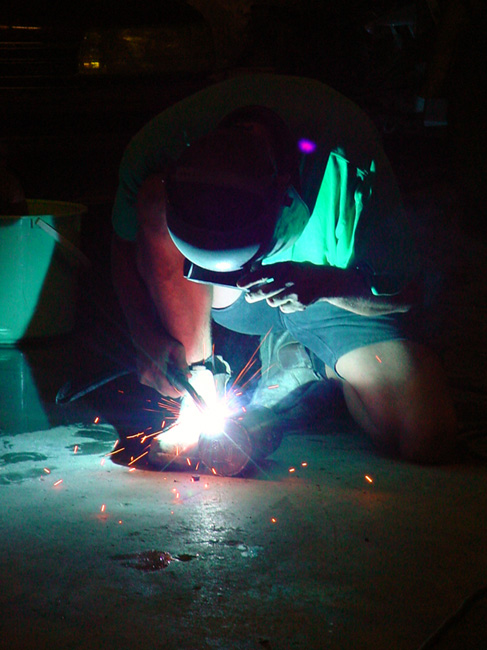
 welder
- plasma cutter or air saw
- grinder
- file
- sandpaper
- drill and large drill bits
- screwdriver
- painting apparatus
- sealing tape
Procedure
- gather all the materials and tools you will need
- trace 2x4" diameter circles on the steel sheet for top and bottom plates of the tank
- cut out a rectangular section of metal to act as the baffle
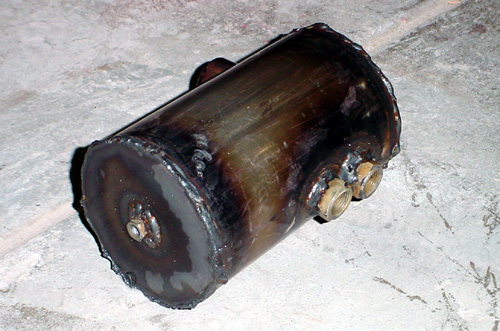
- mark on the section of 4" pipe the position of the 2 inlet pipes and the filter pipe, and mark the drain plug in the middle of one of the circles.
- cut everything out - use either a plasma cutter or an air saw, and a drill for the smaller holes
- weld the baffle at right angles to the top plate
- weld the bottom plate onto one end of the 4" tube, the about 1/4 fill the bottom of the container with steel wool
- weld on the top place with baffle attached
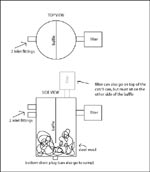
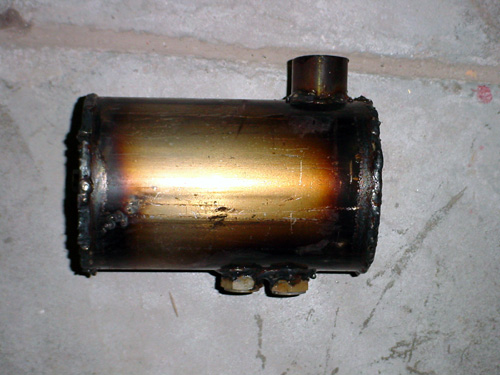
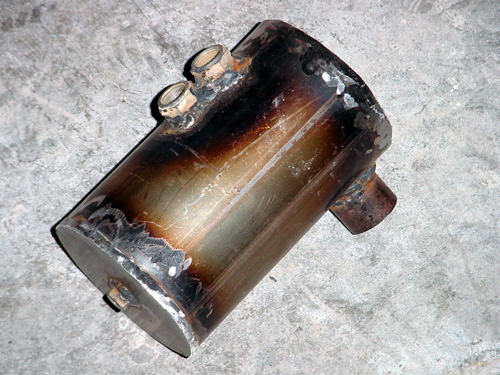
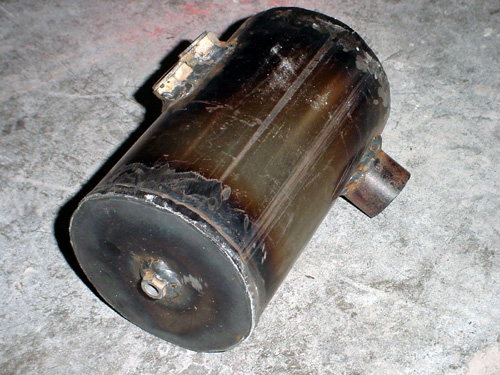
- weld on nuts for inlets (2), drain plug and pipe piece for air filter, we placed ours on the side of the tank opposite the 2 inlet holes, but depending on how much room you have you can also have this pipe coming out the top of the tank
 |
 |
 |
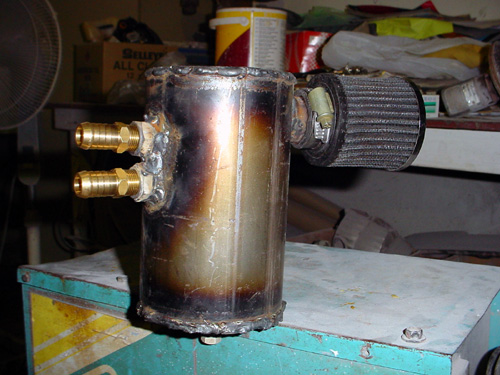 |
- grind off excess weld and generally neaten it up, using a grinder and a file for the finishing touches
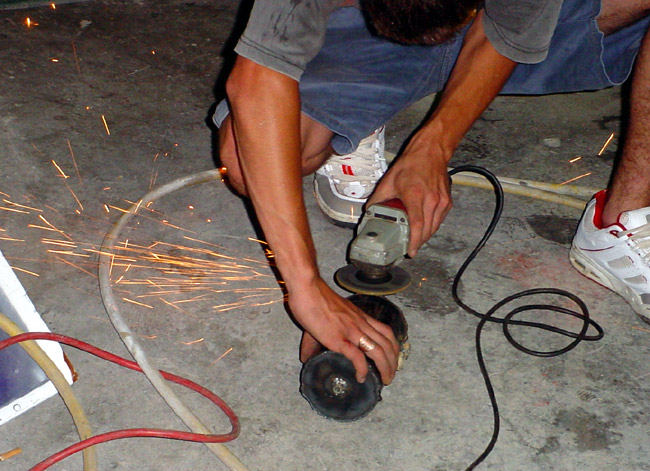 |
 |
 |
- give whole tank a sand with some 80 grit (coarse) sandpaper
- prime then paint
- assemble - screw in the pipe fittings for the inlet pipes, screw in the bolt for the the plug at the bottom, and slide the filter onto the adapter and secure with a hose clamp
- mount in engine bay
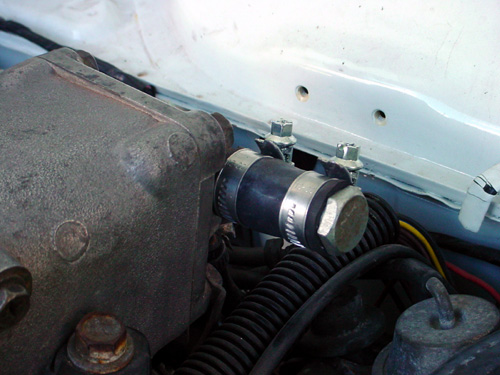
- cut to length and join the pipes from the tappet cover to the catch can, and secure with hose clamps on both ends
- block off the old lines from the plenum and turbo pipe
 |
 |
To mount in your engine bay:
Select the best position - for 1600's on the right (passenger) side of the engine bay is a good place, affixed to the strut tower with either a stainless steel strap (this is what we did) or mounting brackets welded onto the tank before painting.
